Google Sheets
Google Sheets is a free, cloud-based office suite offered by Google that lets you create and update spreadsheets and collaborate with others. Boltic supports Google Sheets as a destination allowing you to import any source's data to Google Sheets without writing any code.
Limitation
When sending data to Google Sheets, remember that the Google sheets have a limit of approximately 5 million cells.
Prerequisites
To send data to a Google Sheets, either you need an active Google Account or Service Account. If you use a service account to import data to the Google Sheets, you'll need to upload a JSON key file.
If connecting via service account, the Google Sheets and Google Drive API's should be enabled
The essential scopes are given to Activate to access your Google account.
Step by Step Guide to Configure Google Sheets as a Destination
Step 1: Add Destination
Go to the Add Destination page to select the Google Sheets as a Destination.
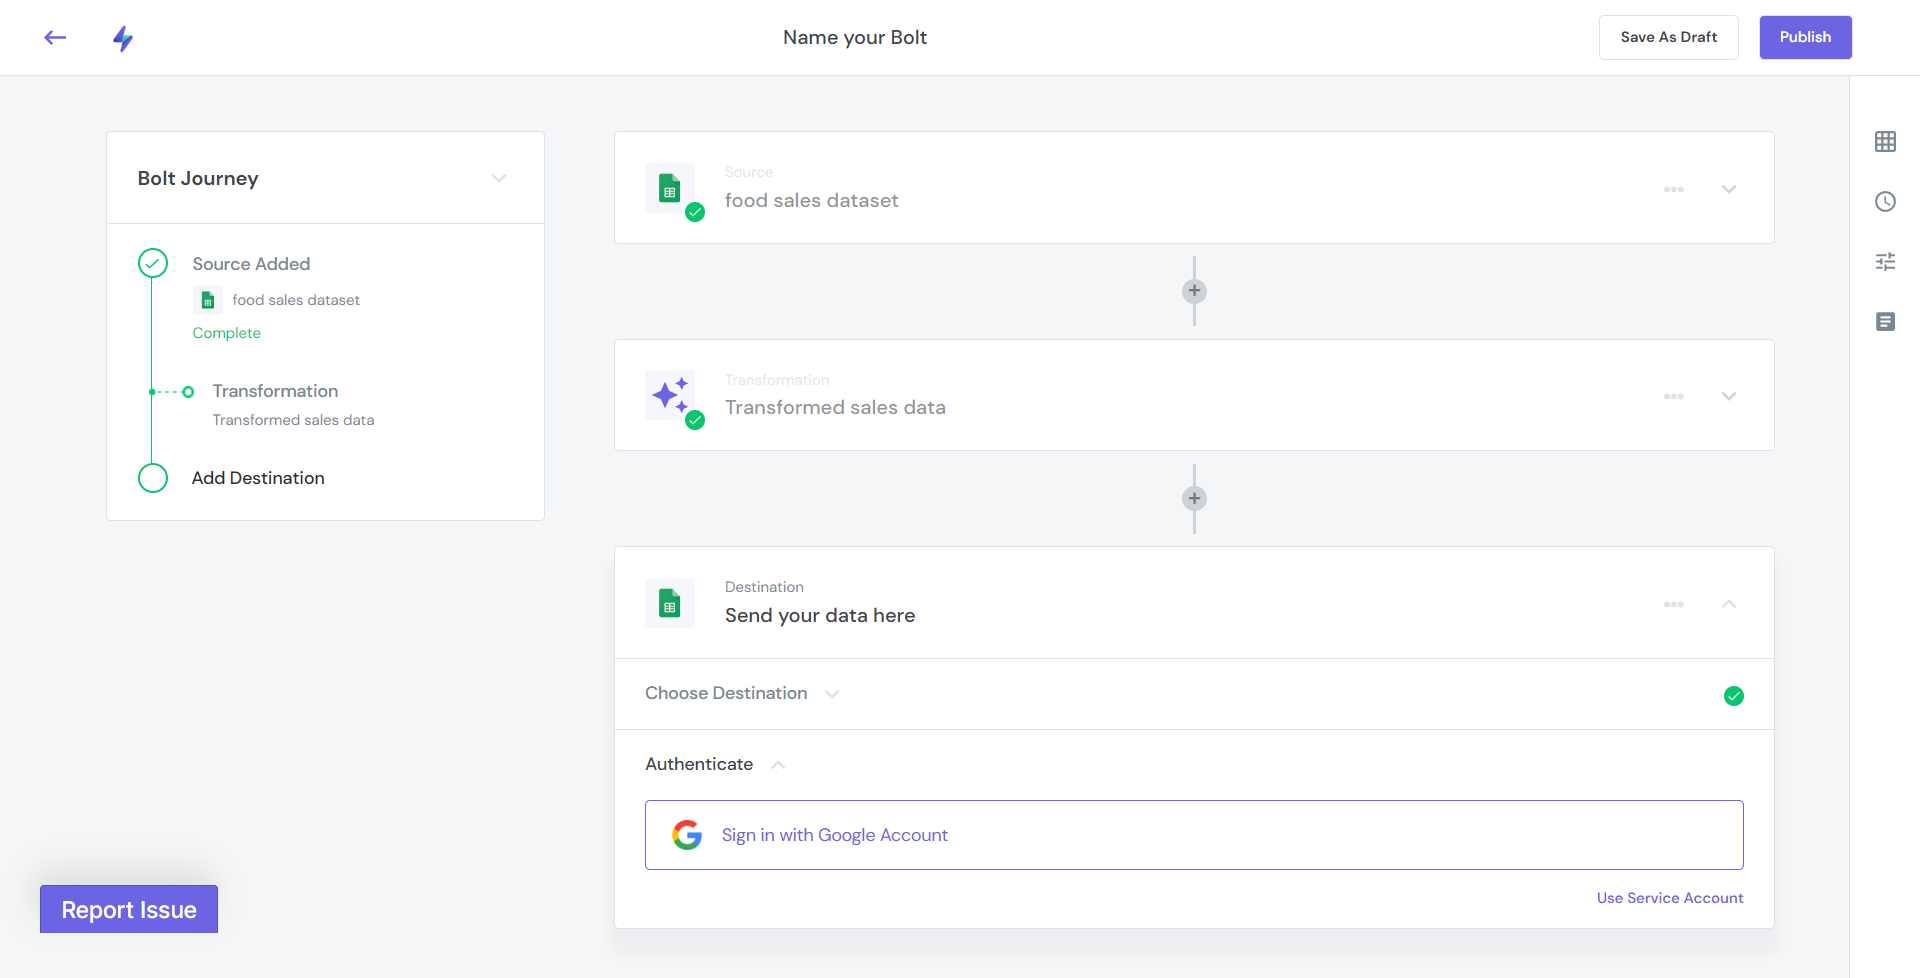
Step 2: Authenticate the Destination
Connect data to Google Sheets with one of the following methods-
Connect with Google Account
- Click the Sign in with Google Account text
Select the Google account that is connected to your Google sheets, and then click Allow
Click Continue
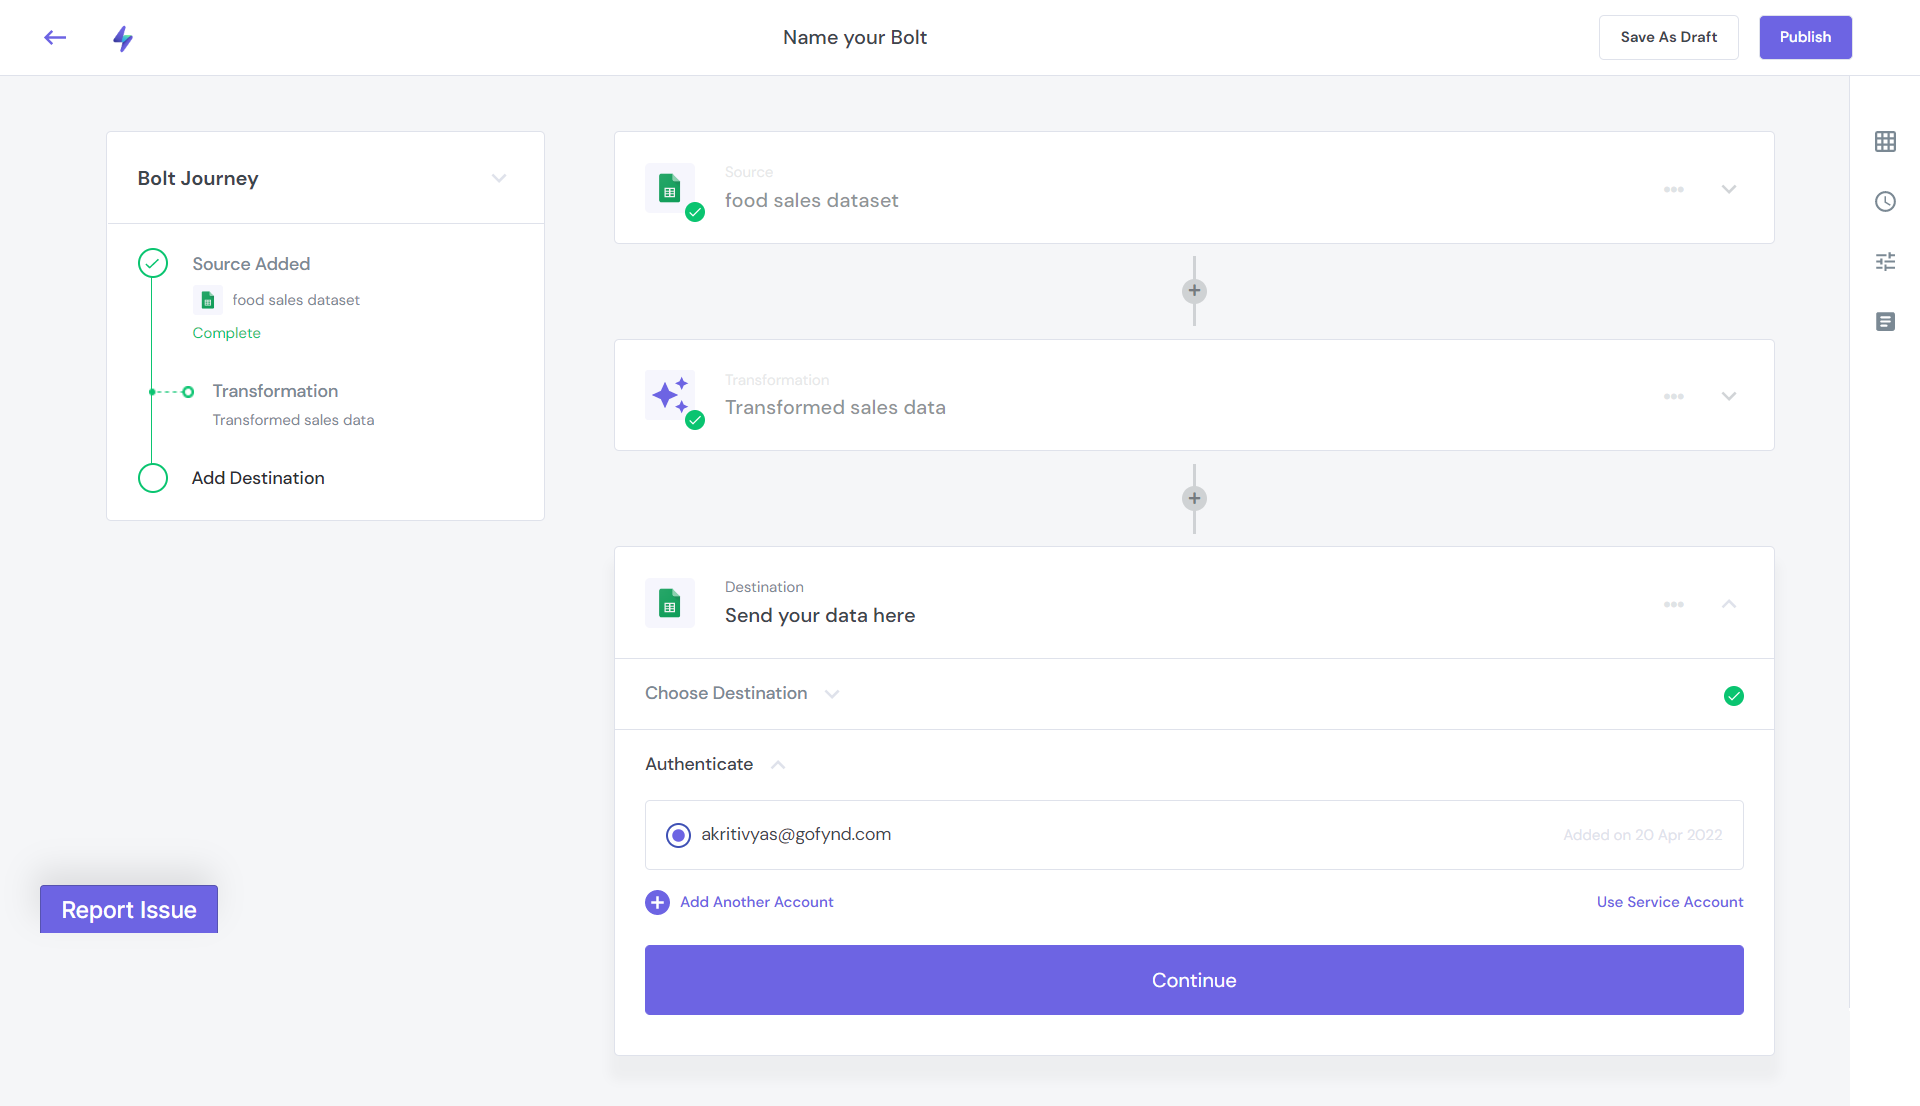
- By selecting the Add Another Account plus icon, you can add multiple Google accounts
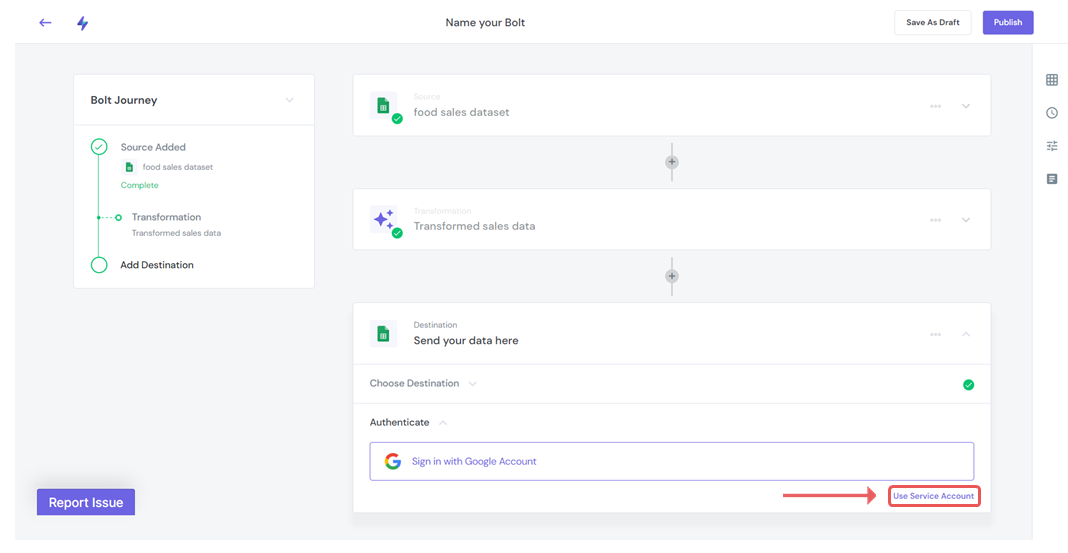
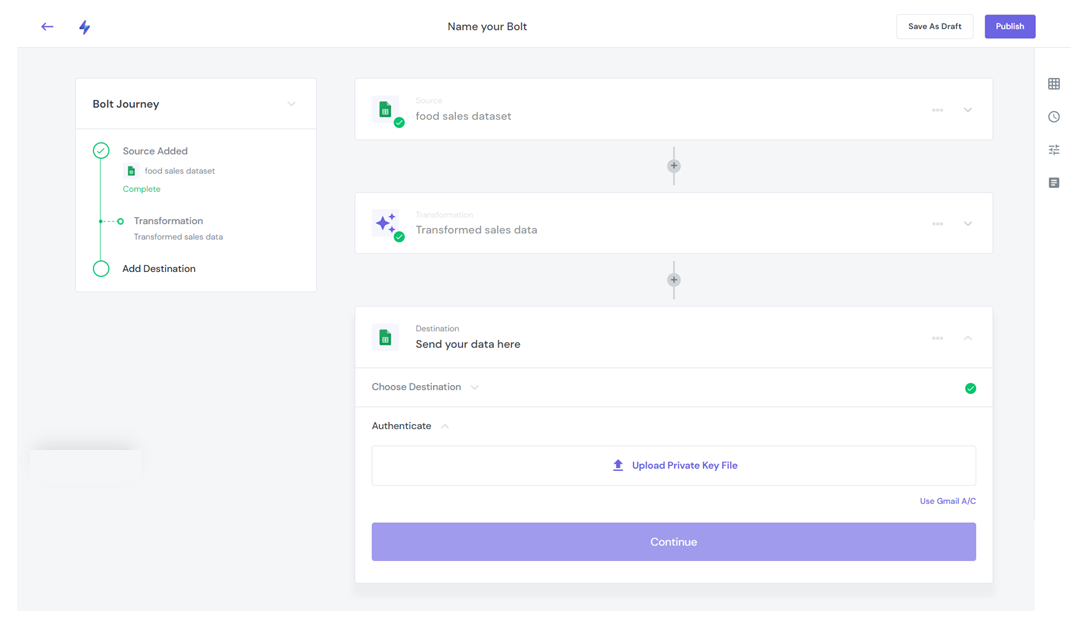
Connect with Service Account
- Click the Use Service Account text
- To authenticate with a service account, upload the Private Key File
Step 3: Choose Sink Mode
To import data to Google Sheets you are required to choose one of the following sink modes-
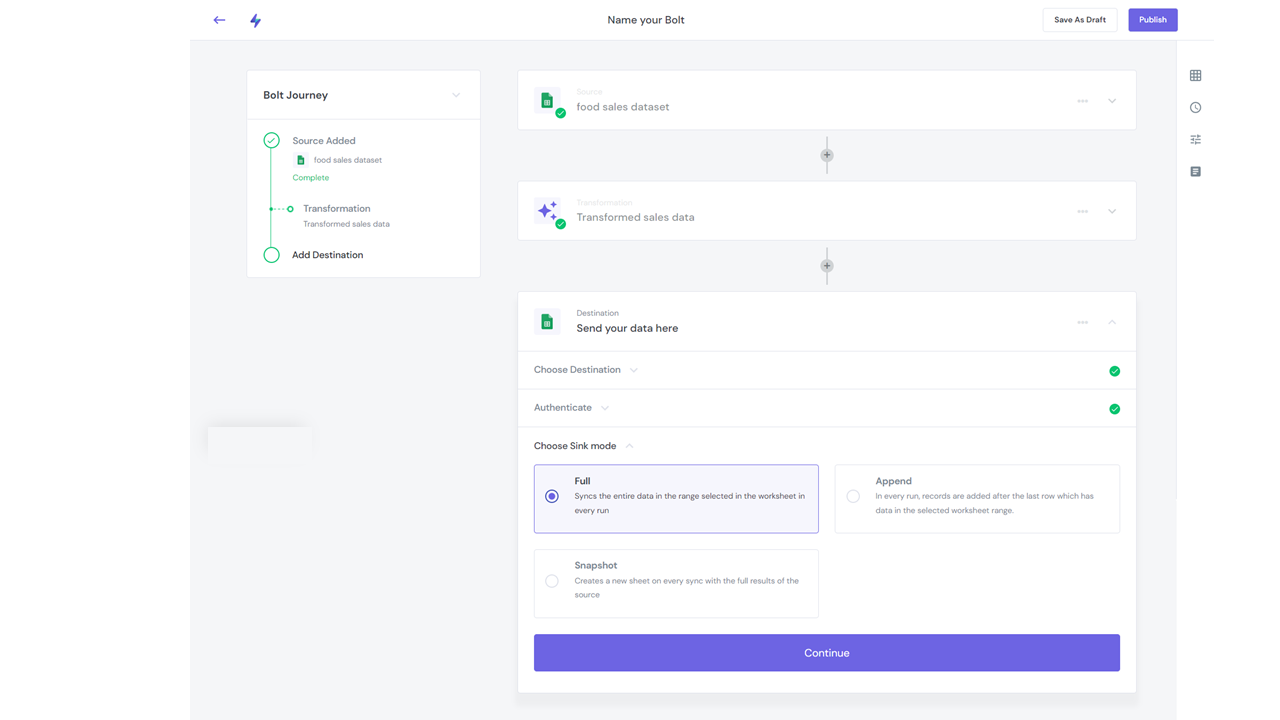
| Sink Mode | Description |
|---|---|
| Full | Full sync mode is a default mode that syncs all of your data from source to destination in every run. |
| Append | Append sync mode appends the new data after the last rows that contains data in every run |
| Snapshot | Snapshot mode allows you to create a new sheet with the entire result of the source on every sync. |
- Once you select the sink mode, click the Continue button
Step 4: Configure Destination
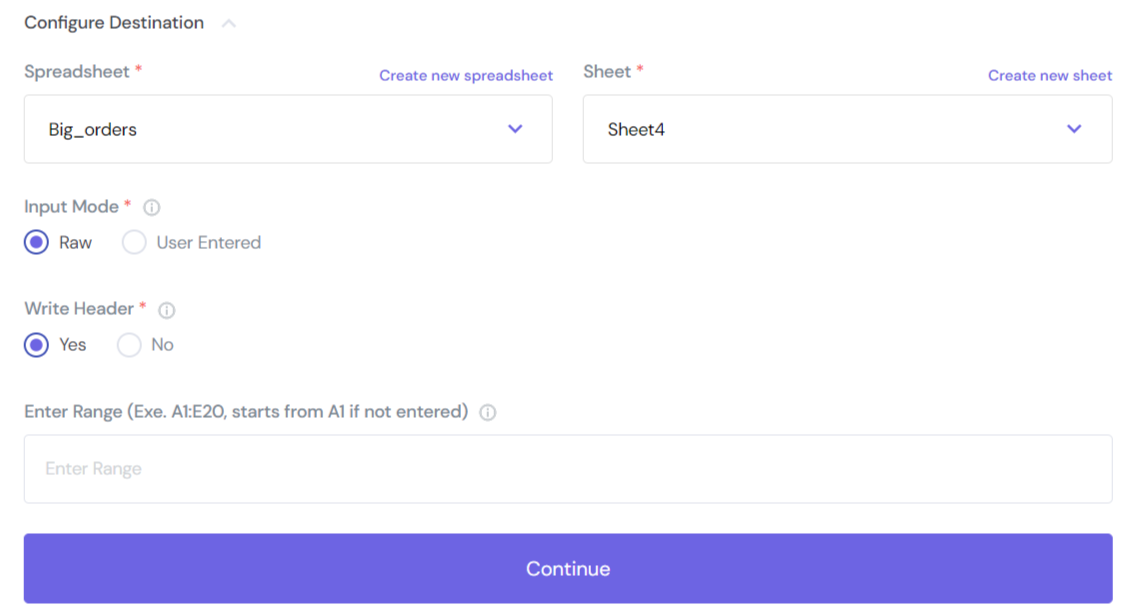
Select spreadsheet or create a new one-
- You now have two choices: Choose an existing spreadsheet from the drop-down menu or create a new one
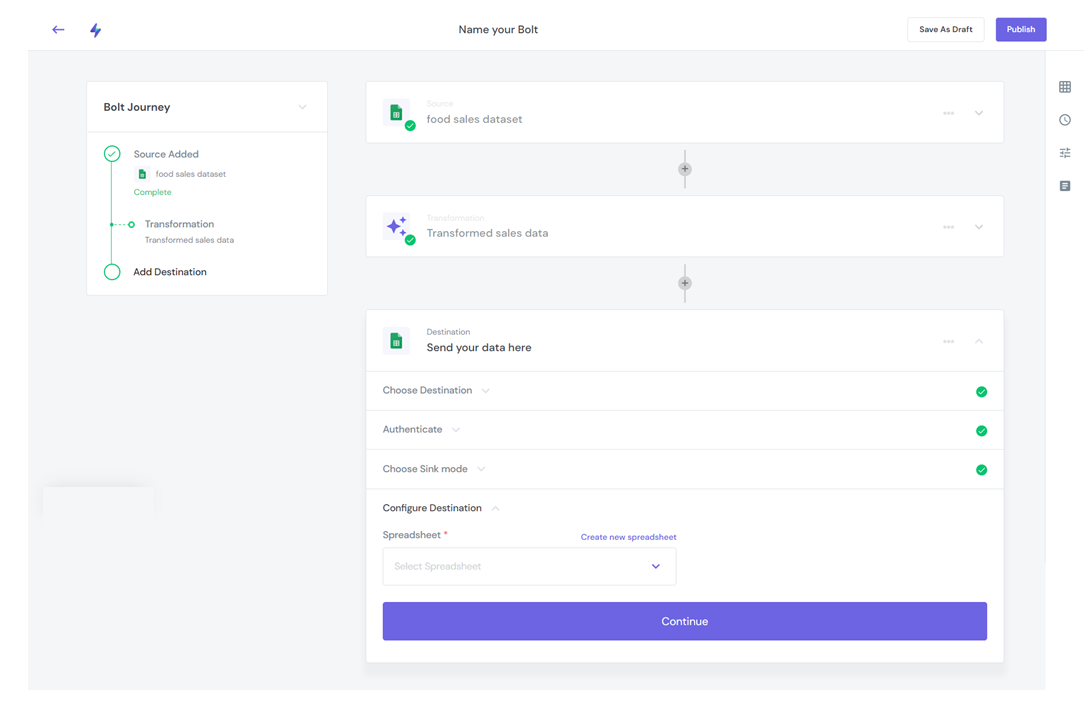
- Users who have created a new spreadsheet are required to create a new sheet to contain the imported data
Select the Data Type- Choose one of the following options to define how the data from the source should be interpreted:
Raw: The data is not parsed and stored in the spreadsheet as string
User Entered: Google Sheets parses the input according to its data entry formats and standards
Write Header
Headers are extremely important to label data and help ensure all viewers understand what the data in your Google Sheet represents.
- By default, your first column will become a header. You can select No to send the data without header
Enter Range
- A range can be a single cell in a sheet or a group of adjacent cells in a sheet. Specify the range of cells in the sheet where the data must be written. Boltic writes data from the first cell of the specified range if enabled, otherwise from cell A1
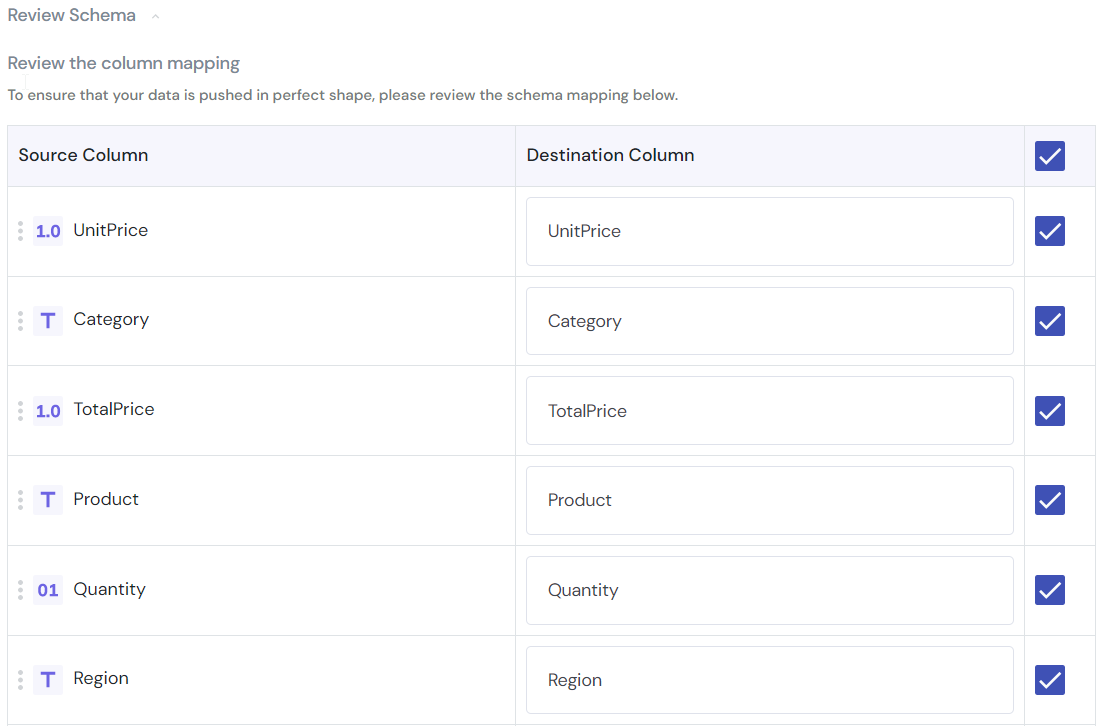
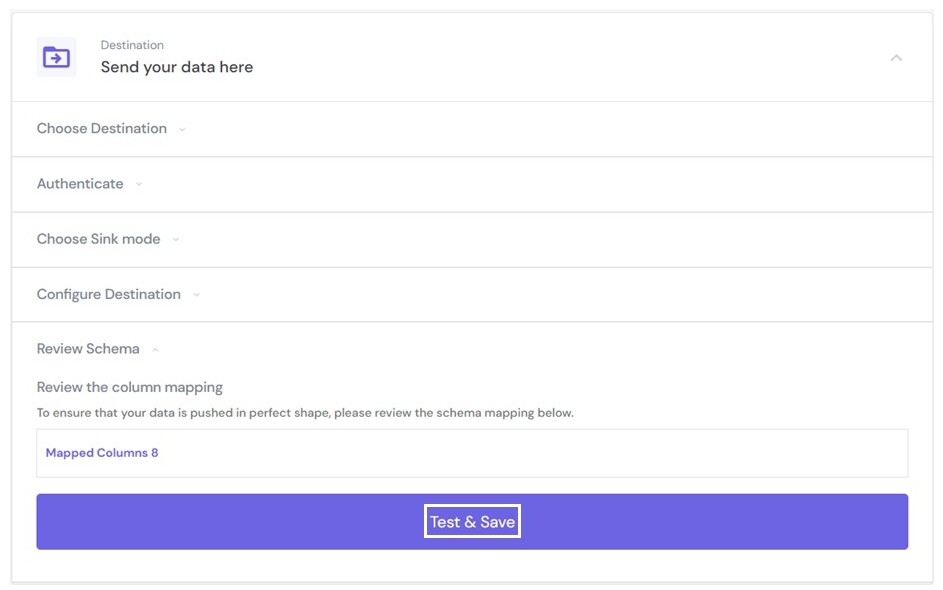
Step 5: Field Mapping
Before you send data to Google sheets, map the fields to configure how data moves from a source to a destination. By default all the fields are mapped, to unmap the field you can deselect the Check box of the respective field.
Click the Save Schema button
Step 6: Test & Save Destination
Once completed the above-mentioned steps, click the Test & Save button to save the destination
Step 7: Publish Bolt
Click the Publish to save the Bolt journey
Scheduling
After successfully sinking data to the destination, you can click on the Schedule to run data continuously to a destination and repeat at a given time or interval.
Any Question? 🤓
We are always an email away to help you resolve your queries. If you need any help, write to us at - 📧 support@boltic.io