Ceiling Transformation
Ceiling transformation is used to eliminate the unwanted decimals places and returns the smallest integer value that is larger or equal to a number.
Steps to Apply Ceiling Transformation
This guide will give you a brief idea of what steps you need to follow to apply the Ceiling Transformation in a queried data.
Step 1: Add Transformation Type
First, visit the "Add Transformation" page to add the Ceiling transformation.
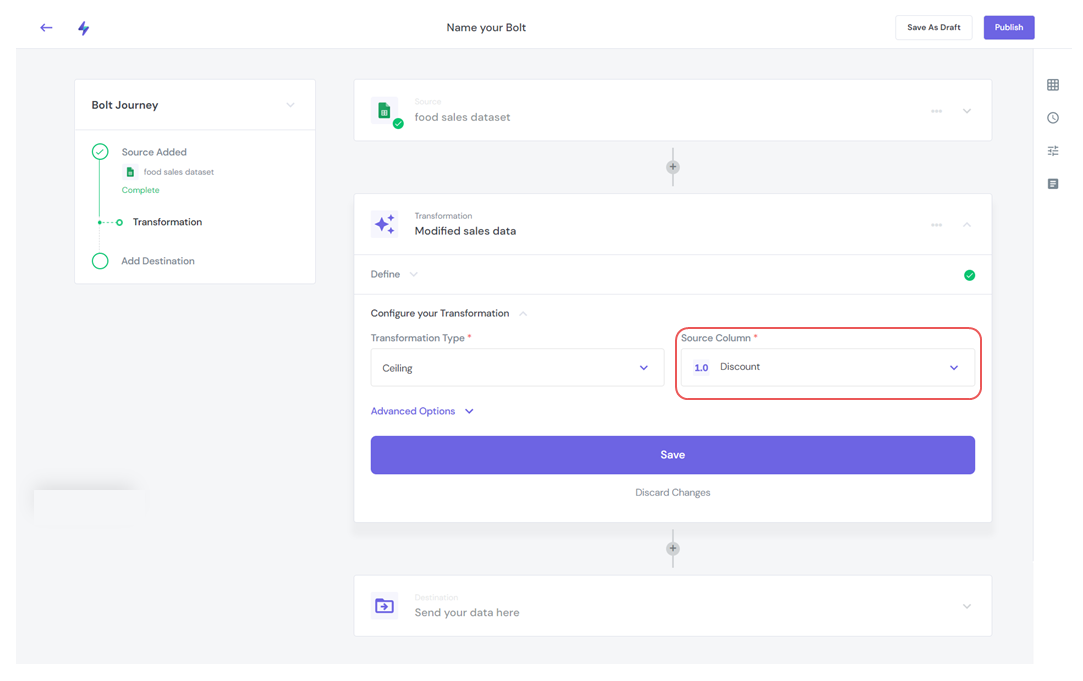
Step 2: Select Source Column
Now select the source column that values you want to round up.
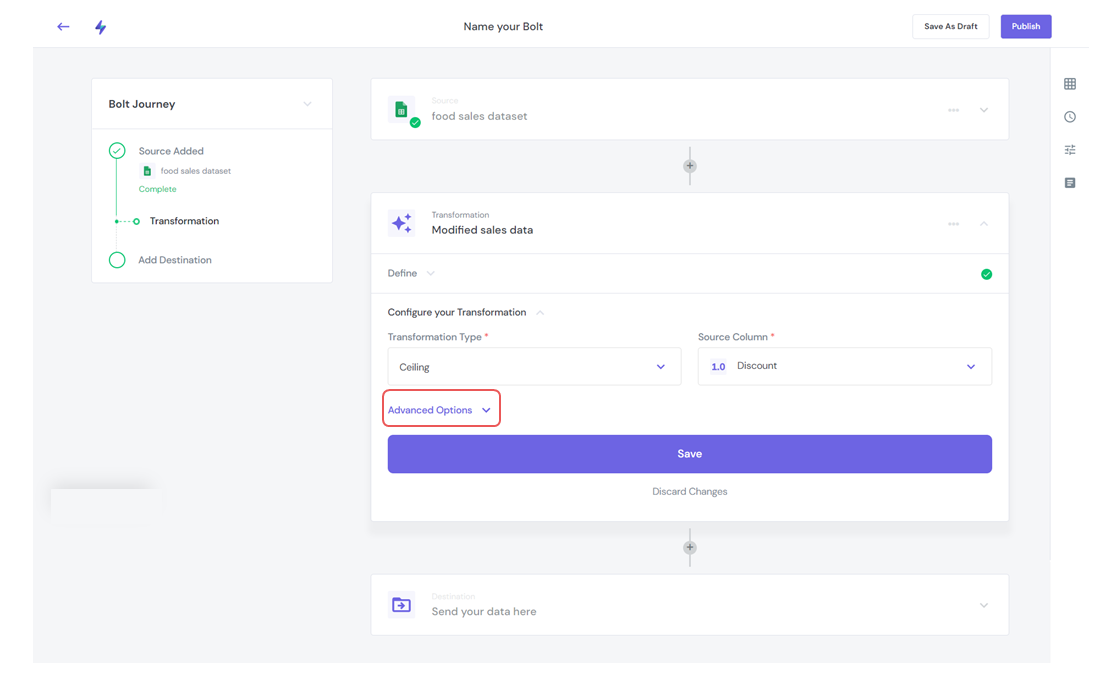
Use Advanced Options
- When you click on the Advanced options down arrow you will get the choice to save the desired output in the same source column or want to create a new column.
- By default, your output will get saved in the same column, click on the Create a new column to create a new column name to save the output
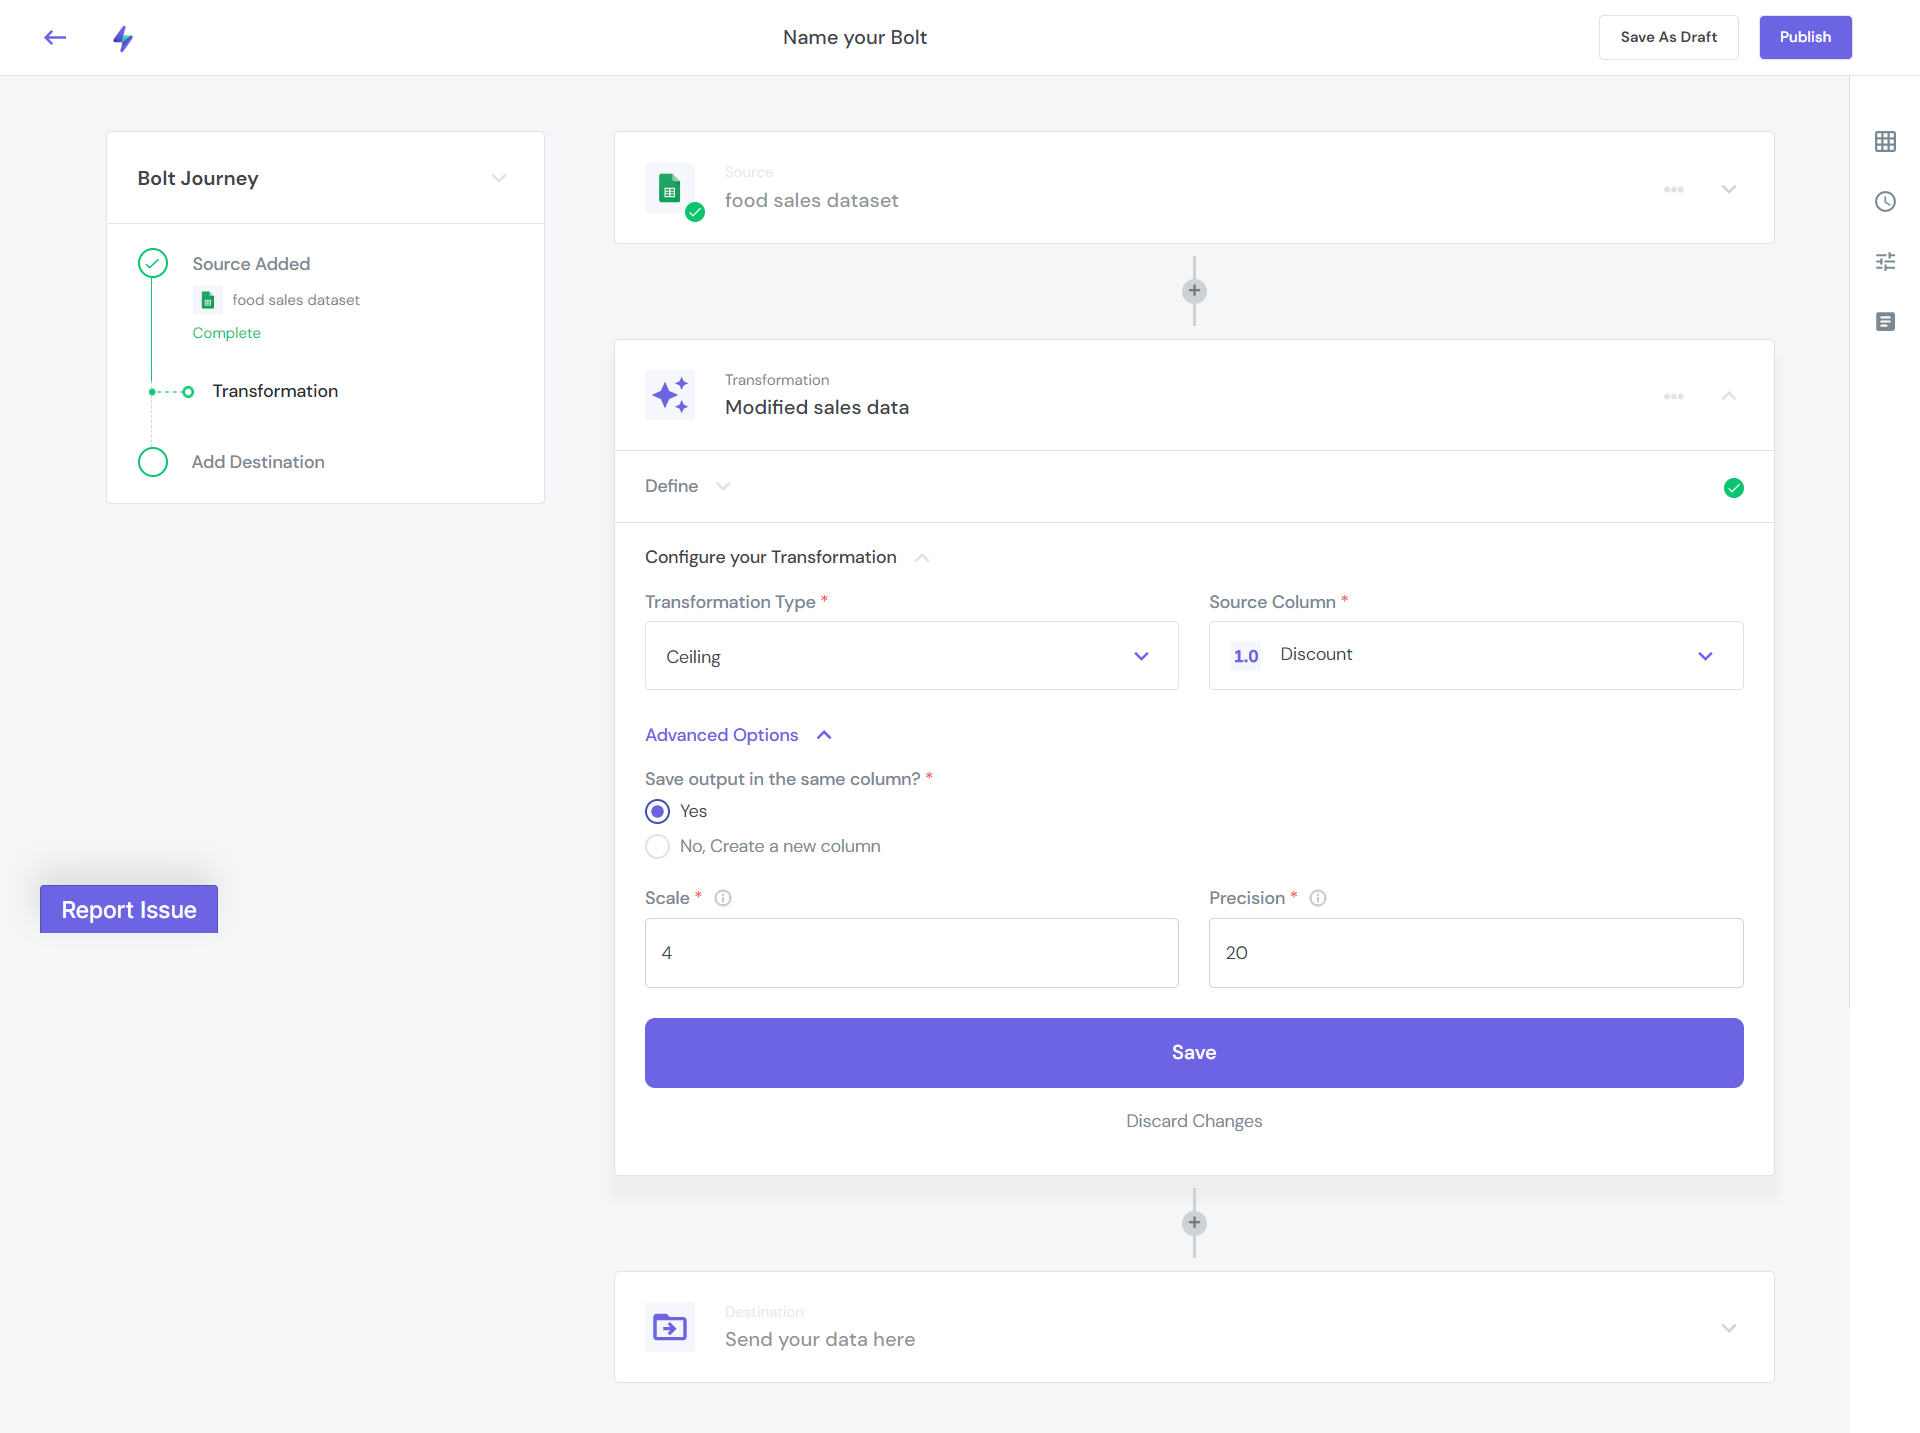
- If your source column data type is decimal and you want an exact numeric, you can specify the scale (Scale can be positive or negative) and precision (the total number of digits, both to the left and the right of the decimal point)
Note
If the scale is not specified, the default scale is 4. If the precision is not specified, the default precision is 20
Step 3: Save the Configuration
Click the Save button to save the configuration.
Add Another Transformation
After defining the first Transformation, you can add multiple transformations to the defined Transformation or add another new Transformation step to a bot This flexibility helps you to get the desired output in one go.
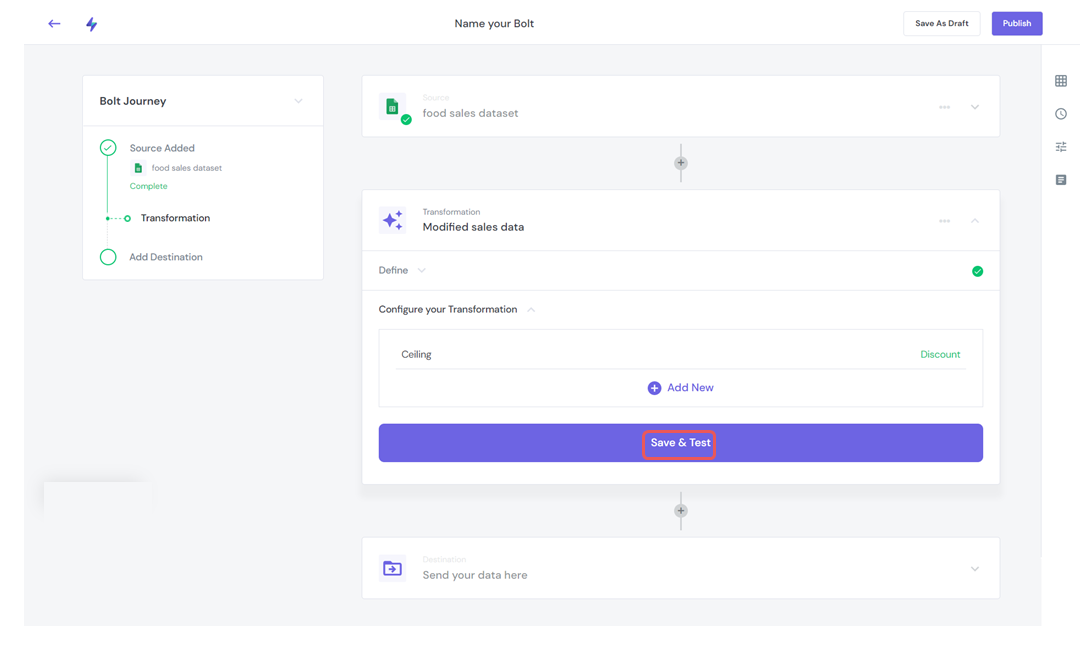
Step 4: Save & Test Transformation
Once the above-mentioned steps are done, click the Save & Test save the transformation.
Any Question? 🤓
We are always an email away to help you resolve your queries. If you need any help, write to us at - 📧 support@boltic.io